🚗 Take control of your drive with universal precision!
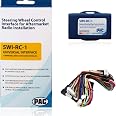
The PAC SWI-RC Steering Wheel Control Interface is a universal, pre-programmed solution designed to retain steering wheel controls across over 3000 vehicle models. Compatible with all major radio brands featuring wired remote inputs, it supports both analog and advanced data bus systems like CAN-Bus and LIN-Bus. With customizable button functions and a 2 amp, 12V accessory output, it ensures seamless integration and enhanced control for a smarter, safer driving experience.


| Manufacturer | PAC |
| Model | SWI-RC |
| Item Weight | 3.52 ounces |
| Product Dimensions | 8.46 x 4.06 x 1.02 inches |
| Item model number | SWIRC |
| Batteries | 1 12V batteries required. |
| Is Discontinued By Manufacturer | No |
| Exterior | Smooth |
| Manufacturer Part Number | SWIRC |
| Special Features | Wireless |
Q**Z
pulling the factory radio is pretty easy, you just use the trim removal tool ...
I fitted into my 2013 Dodge GrandCaravan and also added a rear view camera! Everything works exceptionally well including the factory steering wheel controlI am now Wazing and enjoying my music in my car!!here are my parts used (sorry, being a new user means I can't post any links)0: Atoto A6 2GB/32GB Unit --1. Steering wheel control --2. Rear View Camera --3. Dodge Installation Trim Kit including Antenna adapter4. Soldering iron and solder5. PAC Radio Replacement Interface --6. Trim Panel removal tool --7. Dremel tool set (You need some cutting) --8. Wire stripper --9. Multi meter --10. Electrical tape --11. 3.5MM jack to three pin connector, (look for it in Radio Shack)Now, get to installation,1. pulling the factory radio is pretty easy, you just use the trim removal tool to get the radio panel off and then unscrew the four screws holding the radio in place. Once remove the screws, gently pull the radio out and disconnect the factory harness and radio connector, the radio connector is pretty fragile, be careful not to break it...2. Connect the harnesses, open the PAC harness package, you need to determine which harness to use, for my car, it was the one with slightly bigger connector, try it on the factor harness first. Then lay down the color/wire mapping on your desk and start connecting the wires, PAC did not actually strip the wires so you need to do it, after strip the wires, gently twist so they connect better, then chris cross on with the ATOTO wires and solder the wires on, I like to put my soldering gun under the wire to heat them up and let them soak the solder rather than melt the solder using the iron, better conenction.. After solder, use tape to mask up the bare wires, you will connect all wires except three, the thin Ground wire, KEY 1, and KEY, go ahead and cover up KEY 1, you dont need that . Like picture 13. Wrap the harness, go ahead and wrap the harness so the wires dont go crazy4. Install Steering wheel control (optional), open the PAC SWI unit package, and turn the dial to 7 before you do anything else, TURN THE DIAL TO 7 first. Then connect the 7pin connector (white) comes out from your PAC interface to your SWI unit, go to your vehicle, connect to factory harness and follow instructions from PAC (every car is different, you need to follow the factory instructions) and program it, then use the multiulmeter to find the pins output the resistive differences (this is a bit tricky, my suggestion is to solder wires to each pins on the 3.5mm connector (see pic 2) and then use your multi meter find which two wires output resistive values when you press a button) after you find the two wires, connect them to thin black ground wire and KEY wire (NOT KEY1), and then fire up the ATOTO unit and go to DEFAULT SETTINGS -- STEERING WHEEL CONTROL and see if it registers the presses, if not, swap the wires (because there is no clear way to tell which one is ground...) after you confirm its working, solder the KEY and ground wire5. Placing the antennas, place them anywhere you like, even including inside the radio hole, but I went ahead and place the antennas across the trim and near the wind shield on the driver side so they get better reception.6. Actually installation, because ATOTO is slightly higher than stock unit you need to do a bit cutting, first cut the TRIM Kit side panel about 2mm from both sides, then use Dremel to trim down the top and bottom notch of the stock Trim piece or until it fits7. Back up camera is also fairly easy, hook it up with the reverse light and tuck the cable under the trim and you are good to goHope it is helpful, please leave me a message if you need any help!
D**Y
2003 Cadillac Deville Worked Perfectly
Installed in a 2003 Cadillac Deville. Coupled with PAC OS2-GM32X Retains factory on star and using existing amp. The factory system is only 2 channels. Hence no fade option on factory radio. So you only have 2 channel wires on the OS2-GM32X device. All speakers worked perfectly. The door chime I guess came from factory radio as it comes from this device now.Paired with a PAC SWI-RC-1 retained steering wheel controls. Picture shows correct dip switch settings when used with OS2-GM32X. Note the longer dip switches are what makes it communicate with car. The 4 dip switches depends on your aftermarket radio. No wiring needed just plug the SWI-RC-1 into the OS2-GM32X and the 3.5 mm plug into aftermarket radio.The picture of the dip switches are only when used with the OS2-GM32X.Lastly - I did not have the Bose system.
A**E
Full/midsized gm trucks, Atoto unit. *long post* useful info
I brought 3 of these. The first one i received did not work and had the smell of being burnt coming out of the box. Instructions are completely vague and totally useless for any full sized General Motors truck from 99-2002.This section is for all the gmt400 folks who do the UK3 steering wheel control upgrades using buttons from Bravada,Blazer, Jimmy, S-10, Yukon Denali and Escalade.OrIf you own a 99-2002Bravada, Blazer, Jimmy, S10, Yukon Denali, Escalade with Factory UK3 steering wheel controlsThis unit can work but not with the given instructions from the website. If you want this unit to work properly when you go on the website and set the vehicle for a 1994-1996 Oldsmobile nintey eight or Eighty eight. Both of these vehicles had factory steering wheel controls. The Dipswitch setting for the 8 switch location is absolutely WRONG. The unit will not recognize the button inputs. What I did was set my Dipswitches as if it was in a 1996 Oldsmobile Nintey eight and finally I saw results. The Dipswitch setting they recommend for all the full and midsized trucks is 1 down, 2 up, 3 up, 4 down, 5 up, 6 down ,7 up, 8 up. You will not get results with this. Or at least I did not. I used the Oldsmobile set up which was1 up, 2 3 4 down, 5 up, 6 down, 7 8 up.This section is for all with an Atoto A6, a6 pro and probably just about any Atoto Android radio.The Dip switch section here is also wrong on the website. This is a 4 switch section that is to pair with whatever radio you are using. For atoto the Dipswitch setting on the website reads out 1 up 2, down, 3 down, 4 up. THIS IS WRONG!. In fact so wrong that the unit does not even recognize input from and of your buttons. The red led light will not turn green confirming that it recognized any inputs from your steering wheel controls. I got mine to work using the Dipswitch settings of 1 2 3 down, 4 up. As stated by PAC This setting is most commonly used by pioneer units.On the Wiring harnesses there are no instructions out of the box that will tell you what wire does what. The website does give you most of what's important such as ground, 12v accessory and 12 v analog (positive wire from your steering wheel control) but that harness has like 12 or 13 other wires so your kind of left with confusion for a bit.Hooking this up to an Atoto unitThe other wire harness has a 4 wire harness with a blue/yellow wire, Brown wire, a ground, and a 3.5 mm jack. That 3.5 mm jack is useless, even though I've seen a video on YouTube pairing this unit with an Atoto a6 and the guy states that the 3.5 mm jack is all you need 🤦🏾♂️. I've left several questions on said video about how it was hooked up but no answers of course.You will take the blue/yellow wire, brown wire, and connect them. Now from the atoto radio you will have a brown steering key #(+) and orange with black stripe Steering wheel key (+) connect those together. Now you will take all four of those wires and connect them together and it should work. Again the website tells you none of this and I had to spend hours finding out for myself.I have noticed it works but is very laggy. The unit recognizes the input and will turn green as the buttons are pressed but it doesn't do that great of a job communicating with the radio. This is the first interface I have ever used so I cannot compare it to others, but I will say if you have the extra money get a few universal interfaces and see what works best for you. Or at least use one that has clear correct instructions. I'm not displeased with the interface nor am I completely satisfied. But I am displeased at the blatant wrong information being put out on their website. I was told "Pac" was top teir when it came to this kind of stuff but obviously they missed their mark on this one. Sorry for the long review but if I can help someone out then all this time spent was worth it.
B**Y
Works amazing
Excellent product at a great price. I wish it came with paper instructions but the online guide is pretty easy to use and tells you exactly what you need to wire it into your wiring harness for whatever make and model car you have.
Trustpilot
1 month ago
5 days ago
3 weeks ago
1 day ago